Pasta, Veggies based & Vegetarian

Foolproof Marinara Sauce

Over the years, I kept adjusting my recipe for a true, delicious Marinara sauce. You know, that classic staple of Italian cuisine, a base for many Italian dishes. I love this marinara sauce in lasagnas, with meatballs, or, when adding a ground beef you can turn it into Bolognese. Why would you bother, when you can buy a ready to go jar of sauce from multiple brands? Well, maybe if you’re watching what you eat, like me, and want to eliminate unnecessary sugar, different preservatives or chemicals from your diet. Plus, making it yourself allows you to use organic ingredients and control the taste.

Marinara takes time, but it’s not difficult to make! You can even make a large amount, split into containers and freeze. With an extra bonus of the lovely aroma in the kitchen.  Mix with zucchini noodles and you have got a delicious Paleo or Keto meal!


Foolproof Marinara Sauce

Yield: 4-5 portions

  • 2x 28oz cans of whole tomatoes (preferably from San Marzano, any brand)
  • 1 small onion minced
  • 3-4 cloves garlic minced
  • 2 medium-size carrots, peeled and cut into small cubes
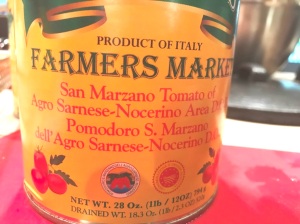
    San Marzano Tomatoes
  • 2-3 sticks of celery, cut into similar size cubes
  • Dried oregano
  • Olive oil
  • Salt and pepper
  • 1 Cup water
  • 1 tablespoon Tomato paste
  • ½ cup white wine (dry Pinot Grigio, Chardonnay, do not use cooking wine)
  • ½ teaspoon red hot pepper flakes
  • tablespoon of butter (optional)
  • Big bunch of fresh basil
  • Rim of parmesan cheese (optional)

Heat up oil in a large pot, and sauté onions, garlic, hot pepper flakes, oregano, carrots, and celery for about 3 minutes on medium low heat, or until nice and aromatic. Most delicious dishes start with some variety of soffritto, which is also the base of this sauce. I personally like smaller pieces of veggies, but the cut is completely up to you, as long as they’re a similar size for even cooking.

Season with salt and pepper. In the meantime pour whole tomatoes into a food processor and pulse a few times (for small chunks of tomatoes in your sauce). If you don’t like chunks in your sauce, then process completely until tomatoes turn into a puree.


When the veggies start to soften up, add tomato paste and mix well to caramelize the paste. Cook for a minute with vegetables and pour white wine over everything. Let the wine evaporate, and when almost dry, pour in tomatoes with all its juices. Add water. I often pour little water into tomato cans and splash to make sure every bit of the tomato juice went into the sauce.

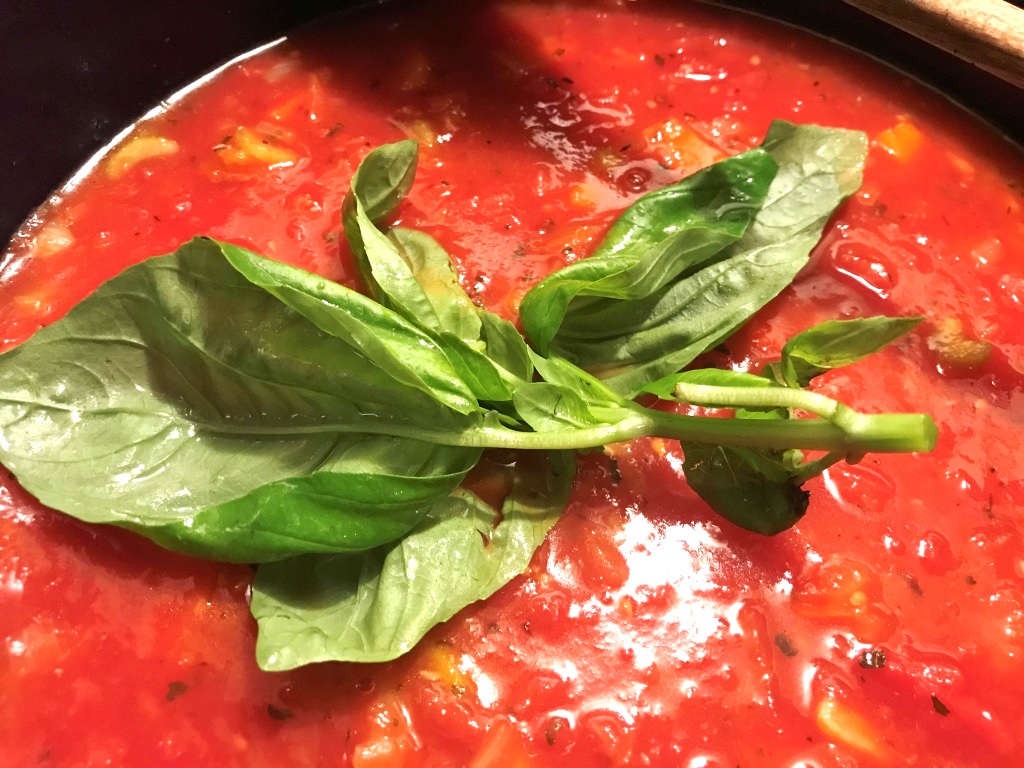
Cut a big chunk of basil, wash, leave whole and add to the sauce. Mix, turn the heat to simmer low, and let the sauce cook for about 1-2 hours, or until it reaches desired consistency. If using, add the parmesan rim for a flavor. The sauce will reduce about 1/3 of its original amount.

When the sauce is to your liking, taste for seasoning, and eventually add more salt and pepper. If too acidic, add a tablespoon of butter and let dissolve in the sauce. Fish out the big chunk of basil that was cooking with the sauce and the parmesan rim.

Slice up a handful of fresh basil and add to the sauce when you already took it off the heat. Now you’re ready to use your aromatic sauce as it is, with meatballs, in lasagna or whatever you desire. Enjoy!


All recipes paired with wine, Healthy and tasty condiments

Make your own Ghee

If you are into healthy eating, I’m sure you heard of ghee. I got used to this delicious golden goodness as I’m cooking more and more Indian cuisine.  Ghee is a fantastic replacement for oil or butter when you need to cook or fry on higher temperature – its smoke point is more than double of the typical cooking temperatures (which is about 200°F). Yes, so is coconut oil, but some people don’t care for the added flavor of coconut in their dishes that some of the coconut oils provide. Ghee really is clarified butter – when the fat is separated from milk solids.

I was told by a rabbi once that ghee is naturally kosher (when you make it yourself), acceptable for people with dairy allergies because with removed milk solids, there is a minimum trace of dairy in the ghee (although I’m not a doctor so please take this as my opinion based on experience, with a dose of skepticism).  Ghee is naturally easier to digest, have a longer shelf life than regular butter and doesn’t have to be refrigerated. Mine sits on the counter because I cook with it a lot. It’s also an SOS solution to use instead of butter when you forgot to take the butter out of the fridge, and it’s too hard to spread on your delish baguette.

When you leave ghee out, it stays either liquid or soft, ready to be added to my Bulletproof coffee or to accommodate my morning omelet.

But don’t make the same genius mistake my friend once made when she first attempted to make ghee years back! She did what everyone does – searched the Google for an answer. It was good (I guess), but the recipe didn’t say which part of the separated liquids and solids is supposed to be strained into the jar. In other words, which one is the GHEE???!!!! So she threw out the ghee and kept the solids. A disaster.  Yeah, the milk solids to throw out are the white stuff, and the beautiful golden liquid is what you want :).

These days the popularity of ghee grows and you can get it anywhere – but why not make your own? It’s really easy and you know exactly it’s clean, made from the highest quality of butter.

I know two ways how to make it – but usually go for the second, much easier way. If you’ve time and patience though, you can try the traditional way to make ghee.  Let’s start with buying a good, organic butter from grass-fed cows. Or, Kerrygold Irish Butter (that I swear on) which is not organic, but the quality, in my opinion, is much better than what’s available on the American markets incl. organic. Trust me on this. Just open them side by side, and compare the color. High-quality milk doesn’t create white butter.

So, in the traditional prep method, you heat up a butter in the stainless steel pot, stirring on medium-low heat, until the butter starts to separate and create foam (which you remove), and you’ll keep going and doing the same until all the milk solids are gone and all you’re left with is a golden ghee. It takes 15-30 minutes, depends on how high your heat is. Making ghee this way creates a lovely, nutty flavor of ghee – but there are few negatives to it. You have to stand by it and attend it the entire time. It’s quite easy to burn it and ruin the whole thing. But, some people swear that this is the proper and only way to do it.

Well, I make my ghee usually while I’m cooking other, multiple dishes, and can’t stand above the stove, watching ghee. So here is my super simple way: preheat the oven to 250°F. Place two whole Kerrygold Irish Butters (I use unsalted but it’s up to you) into an ovenproof dish that’s big enough for the butter but also good to hold when the hot ghee is ready to be strained and poured into a jar. From 2 bars of butter (or 4 American split ones) you will get about 16 oz of liquid ghee.

Place the dish with butter into the oven, turn the timer for 90 minutes and go do other things. No need to check on it, or attend it in any way, until the timer beeps and you take it out of the oven.

Prepare a strainer and cheesecloth (I have one I only use for ghee) and slowly strain the ghee into a designated glass jar (it’s going to be super hot, so don’t even think about plastic). let the jars open on the counter until it cools off.

You’re done! Whatever stays in the container you made it in – all the white milk solids – then gets thrown away. If some of it gets into your ghee anyway – it’s an easy fix. When it cools off, put the jar into the fridge. The ghee will harden just like butter but the white solids always stay liquid and on the bottom of the jar. Poke a hole in the ghee with something long and sharp and just pour the white stuff out of the chilled and firmed ghee.

I also started gently seasoning my ghee – by adding 3-4 cloves, or 1-2 bay leaves and enjoy the very mild, gentle flavor. Just imagine how great your next Chicken Tikka Masala will taste!!! And please, let me know how it went!

Chef's Table - behind the closed door wine & dine

So you hired a Personal chef to prepare your dinner party. Now what?

Most people don’t know what to expect and how they should prepare the kitchen. Unfortunately, some don’t want to lose their cool so they don’t ask either. When I first started my Personal chef business and came to prepare my first dinner parties at my client’s homes, I quickly understood that what seems logical to me, may not even cross some people’s mind. Especially, when the person I planned the party with, doesn’t cook him or herself.


The whole reason to hire the personal chef is to enjoy a stress-free evening. And that’s my goal as well. Or, to impress your mother in law, whatever works. That means that I’ll also need certain help from you in order to prepare an unforgettable meal for you and your friends or family.

I put together the following list of things that may seem obvious but … let’s just say that  I learned my lesson over the years.

We booked the date, already discussed the dietary needs, personal preferences, agreed on an exciting menu and the day of the party is approaching.  This is what happens on the day of your party:

» I’ll shop for the freshest ingredients that I need to prepare all the dishes for you

» I’ll bring everything to your house on the day of your party, and start cooking

» I’ll plate and present the dishes as we previously agreed

» I’ll serve at the table or prepare a buffet based on our agreement

» I’ll pack possible leftovers to your tape-ware and stock it in the fridge

» I’ll clean up the kitchen, pack my stuff and leave you to enjoy the rest of the party


Let’s make your dinner party a success and joy for everybody:


Show me around

When I come to prepare your party or special dinner, most likely I’m coming to your house for the first time. I’ll appreciate if you can spend few minutes upon my arrival to show me around the kitchen, where do you plan to present appetizers and where the main course will be served.


Make a virtual inventory

Do you have enough plates, silverware, and glasses for each of the guests? Don’t forget that we’ll serve multiple courses and we might not have time to wash the plates in between. Unless you have plenty of your grandma’s beautiful china pieces you want to show off – you might want to consider renting plates and silverware, or for less formal setting, even getting some nice looking disposable dishes. Let me know if I can help.

Give me a space

I’ll need as much counter space available, as possible. I’ll bring a lot of stuff with me, plus I’ll need a space to start plating the dishes before we bring them to the table. Please, remove all gadgets that aren’t necessary for the evening, from the kitchen counter.


What are we serving it on?

Not everybody has serving platters or bowls that are suitable for a larger party. I can use your serving platters and trays if you have them. If not, I’ll bring my own. Just let me know ahead of time.


Keep the food cool

I’ll need some space in the refrigerator to keep dishes cold before cooking or serving them, and then for leftovers. If you have an additional fridge in the garage, please use it for emptying some stuff from the kitchen fridge. It’s much easier for me to use the kitchen fridge than running from kitchen to garage fridge in the middle of cooking multiple dishes for the party.


Sorry, the kitchen is now mine!

From the moment I “move in” with my stuff, the kitchen will be mainly off-limits for anybody else. You may understand it but trust me, there is always Aunt Annie who “just sneaks in to reheat a dinner in the microwave for her picky child” 🙂 or other guests coming with food and trying to stick it in the fridge you just emptied for me. It may happen at the worse possible time when I need to take out hot pots from the oven or in the middle of plating. Of course, we’ll try to accommodate, but it’s better you gently direct your guests to stay out of the kitchen. Small children especially! They don’t understand the danger.


Set up your bar for a success

Arrange things you’re going to need ahead of time so you don’t need the kitchen yourself – it helps to set up drink station away from the kitchen, set up the flowers for the table, prepare wine glasses, drinking glasses, napkins, any other glasses you may need, wine bottle openers, beer openers ahead of time, scissors, slices of limes or lemons, and have it all ready on the bar. Keep an extra roll of paper towel handy. A bag of ice in the cooler is a plus.


Dogs, parrots or monkeys are out of jungle

Although I’m a big dog’s lover, it’s not wise and safe to have pets running around when a professional preparation is going on in the kitchen. I once had a situation when hostess’s Chihuahua jumped on the couch and started helping herself to an array of Filet Mignon appetizers on the side table. Before we noticed, half of our work was ruined and wasted. Chihuahua was so pissed we found out, that she came around and peed in the middle of the kitchen right when we served the dinner. OK, maybe Chihuahua isn’t my most favorite kind of the dog after all.


Designate a space for gifts and “stuff”

Your guests – I might need your help there. We all love to gather around the kitchen and chat about food, but it’s not such a good idea when a chef is trying to prepare several dishes at the same time, and need a space and concentration. Kindly point your guests where they can leave gifts, purses, bottles they brought, jackets, keys, cell phones and other items they love to place right on the kitchen counter. I need that counter for serving the food or for my prep. If you devote a place where they can leave their stuff, it helps big time!


The practical matters

Please, have the dishwasher and garbage empty so we can use it. Show me where an extra garbage bags are so I don’t have to bother you with questions during the party. Usually, we can find “all the usual suspects” in the kitchen somewhere but it saves time.


I want you to spend a beautiful, relaxed evening. Let’s put your legs up without any worries, fill your evening with laughter, good time – and, of course, a delicious, Instagram-ready food!

I hope this helps to make you feel more comfortable as well. There is never shame in asking questions – let’s discuss everything twice rather than having to improvise because we didn’t think of something important.

Loaded Recipe Series, Poultry, Veggies based & Vegetarian

THE.BEST.Cauliflower.side.dish. EVER

For some reason, cauliflower wasn’t always a superstar. Yet one of the most favorite vegetables for me. We grew cauliflower in our family garden, and I loved it prepared many different ways. It surprised me how many people had reservation about this beautiful “white flower” and had no idea how to make it tasty.


Long before Atkins or Paleo was hot, I enjoyed cauliflower based dishes as a replacement for the meat. Fried, sauteed with sausage, onion, and eggs,  as cauliflower fritters or as my multiple veggie mixes. Later, when everybody started going avocado about the low carb diets, cauliflower was suddenly IN. Cauliflower fried rice, mashed cauliflower “potatoes”, cauliflower steak,  cauliflower dough for low carb pizza – and I must admit, these were exciting new ideas for me too. Cauliflower is delicious and super rich in nutrient on top of that. What’s not to love?

This recipe is one of the most fun, fast, easy and super tasty way to prepare a side dish with cauliflower. It screams SUPERFOOD!!!! Cooking for cancer patients, I have developed several recipes that are loaded with all the anti-cancer properties, boosting immunity and of course, tasting good. Here is one of them:


Turmeric Roasted Cauliflower with Zucchini


Turmeric Roasted Cauliflower with Zucchini

Ingredients:

  • 1 large head cauliflower
  • 2 medium green zucchini
  • 1/2 cup olive oil or coconut oil
  • 1 tablespoon ground turmeric
  • 1 tablespoon ground cumin
  • 1 tablespoon curry
  • 1 teaspoon of whole cumin (optional)
  • 1 teaspoon cayenne pepper (optional)
  • 3 cloves garlic, minced
  • As much finely chopped or grated ginger root as you like
  • sea salt and freshly grated pepper to taste
  • a handful of cilantro, parsley or sliced scallions for garnish

Directions:
Preheat oven to 400°F.

In a large deep bowl whisk together oil with all the seasoning. Cut cauliflower into similar size pieces and thoroughly rinse in the colander (not too small). Let it air dry, while you wash and cut zucchini into thick chunks (zucchini cooks much faster). Don’t know about you, but I don’t care for mushy.

Add both vegetables into the seasoning mixture and shake the bowl until everything is perfectly combined and every piece is coated with seasoning. It’s easy to see because turmeric and curry made everything bright yellow.

Spread vegetables on a large baking sheet. Make sure all the veggies are in one layer. Spoon the rest of the seasoned oil on the vegetables if there is anything left in the bowl.

Bake in the oven until tender, about 15-20 minutes. Time vary based on your oven and the size of the pieces you cut, so check after 15 minutes. Carefully poke a small knife into the thickest part of the cauliflower to check for doneness.

When ready, garnish with your chosen herbs and enjoy!


Turmeric Roasted Cauliflower and Zucchini

I wanted to take a different picture of the full dish of this beauty, but it disappeared as soon as I took it out of the oven. I guess I’m not the only one who loves it!

Did you try this recipe? Do you have a different recipe you want to share? Let me know in comments!


Wine pairing:

I have opened my 2016 Muga Rose for this dish. It’s a rich, crisp and nicely dry rose that goes smoothly with the components of our dinner. Any other unoaked white would be a good match – try a Gruner Veltliner, Pinot Grigio, Sauvignon Blanc or unoaked Chardonnay.


Reviews

Sun Basket experiment – meal no. 3

review-of-sun-basket-picture

If you just came across my blog now, this is a fourth article to my experiment: Chef’s review of Sun Basket home meals services. You can catch up here ….


So, final meal of the week. Wow, somehow we managed to leave the best for last – so far my absolute favorite!

The third meal from our Sun Basket was

Braised chicken with carrots, potatoes and thyme

Even the recipe card admits that it’s almost impossible to develop deep flavors to the sauce when you cook the meal for 20 minutes instead of braising it for hours, like you would normally do this type of dish. However this one hit the golden spot and was absolutely amazing!
cr186

The prep:  *****

Super easy, everything pre-cut.  For some reason I proceeded immediately to peel the potatoes (although I normally wouldn’t) and THEN noticed they were left with skin on in the picture. Well, my bet. Chicken was pre-cut so the prep was easy-peasy. If I was prepping, I would maybe leave a bigger chunks of chicken, as there is enough time to cook it through.

Braised chicken

Cooking time: ****

The total cooking time was slightly longer,  it took me about 45 minute (and I’m a fast chopper) but the result was so worth it! I used red wine where wine was suggested in the recipe (or vermouth or water).


Taste: *****

As promised, the dish came out like it was braising for hours to develop the flavors! I didn’t adjust anything in seasoning, just followed recipe to the letter. So far our absolute favorite.

Portion size: *****

Again, portions were way too large for two of us, so we had one more left over for next day (we didn’t mind at all).

Braised chicken


Overal:  ***** 5 stars out of 5

Five stars without exception. I’ll definitely use this recipe for my own clients. I ‘m always short on time, and this recipe gives me an amazing opportunity to cook something that tastes like it was braised for hours. Great job Sun Basket!

So, those were our first week dishes. Looking back at this first week of experiment, I must say that the service is amazing. All three meals were easy to prepare, tasted fine (OK, I adjusted 2 of them to my own liking, but my taste is totally subjective). The convenience of the Sun Basket service is priceless.

Having ingredients on hand when I need them, not having to think about “what are we going to eat again” after all day cooking for clients, or wondering if I have everything I need.  Having variety of different dishes available really works for me. What I also enjoy is the fact that the program is 3 meals for 2 people a week. Which gives everybody plenty of chance to come up with their own favorite dishes for the rest of the week days.

Would I recommend this to you? Yeah, absolutely! How about you – did you ever try similar service, or this one? What was your experience? How does it compare with Sun Basket? Please share with us in the comments!

P.S.  Catch up on how it all started?  My Sun basket experience

Want to see previous 2 meals reviewed?

Meal No. 1 – Chickpea and quinoa curry with toasted naan  REVIEW

Meal No. 2 – Steak and Eggs with Tomato Cauliflower Rice REVIEW